As part of our migration from legacy Sitecore 9.1 to Sitecore XM Cloud I needed to access content from legacy Sitecore 9.1 master database, In this post, I’ll walk you through how I attached the database to my local XM Cloud and migrated the content using Sitecore CLI. This blog post is divided into two sections:
1> Attaching the legacy Sitecore 9.1 master database to local XM Cloud environment.
2> Making the legacy database accessible within XM Cloud locally and migrating the content using Sitecore CLI.
Section 1: Attaching the legacy Sitecore 9.1 master database
This section walks through how to connect a legacy Sitecore 9.1 master database backup to local XM Cloud SQL Server instance.
Step 1: Convert .bacpac to .mdf
I started by converting the .bacpac file (a backup of the existing production database) to a .mdf file using SQL Server Management Studio (SSMS).
Step 2: Place the .mdf file in the XM Cloud SQL folder
Next, I placed the .mdf file into the following path in my local XM Cloud setup:/local-containers/docker/data/sql
This ensures the file is accessible for SQL Server within the container environment.
Step 3: Connect to SQL Server running in Docker
To connect to the SQL Server instance running in Docker:
- I obtained the container ID of
mssql-1from Docker Desktop.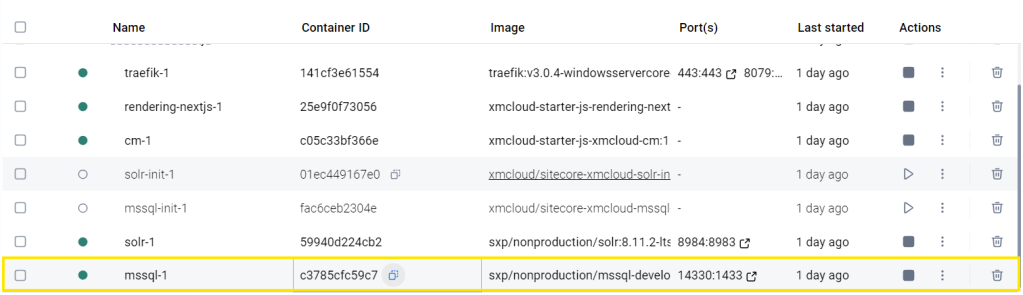
- Then ran the following command to inspect the container and retrieve its IP address:
docker inspect <container_id>
Example:
docker inspect c3785cfc59c7e2987a9680b31697e306a2fe4b2db3631c94908cd1a0cf754d29 - In the output, I located the
"Networks"section, I copied the"IPAddress"value.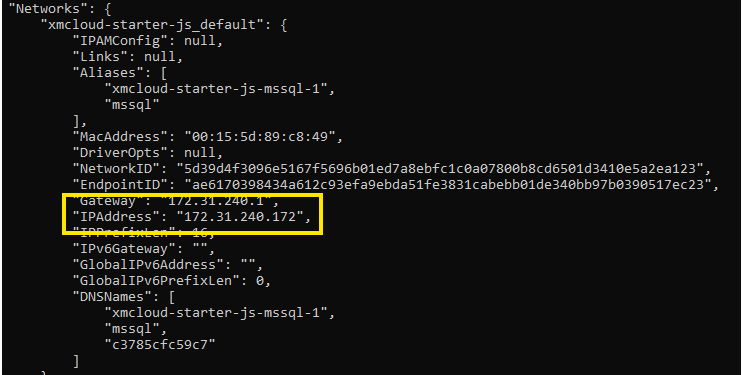
- I also retrieved the SQL Server password from the
.envfile located in thelocal-containersdirectory.
Step 4: Enable required SQL server configurations
Using the IP address and password, I connected to SQL Server via SSMS. Once connected, I ran the following commands on the master database:
EXEC sys.sp_configure N'contained database authentication', N'1'
GO

EXEC ('RECONFIGURE WITH OVERRIDE')
GO
- The first command enables contained database authentication.
- The second command updates the current configuration with override.
Step 5: Attach the database
Finally, I attached the .mdf file as a database. Since I had already placed the file in the /local-containers/docker/data/sql folder, it was available at C:\data inside the SQL Server container.

Section 2: Making the legacy database accessible within XM Cloud locally and migrating the content using Sitecore CLI
After attaching the legacy database to local SQL Server, the next step is to make it accessible within the XM Cloud local environment and migrate the required content using the Sitecore CLI. Here’s how we can do that:
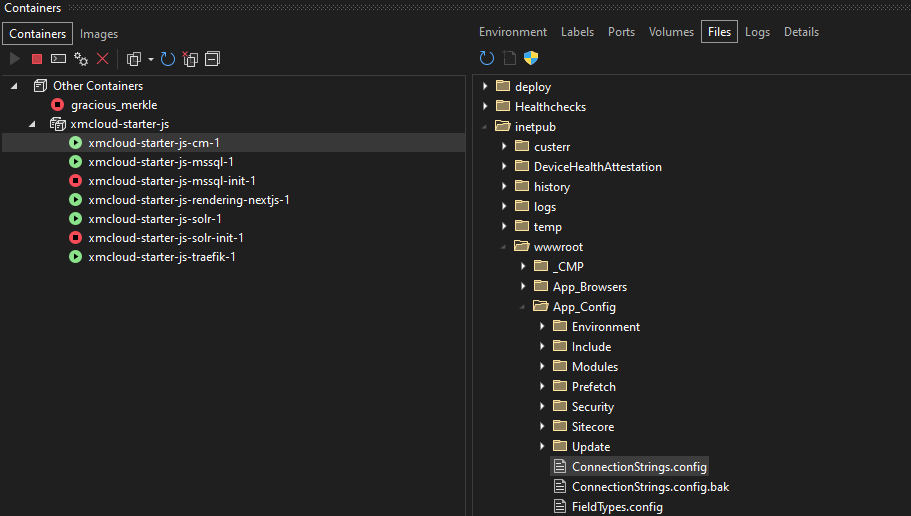
Step 1: Update connection strings to connect to the legacy database
Copy the existing ConnectionStrings.config file into the following path in XM Cloud solution:
\authoring\platform\App_ConfigWe can extract this file from the Docker file system using Visual Studio or another tool.
Update the file with the connection details used to access the SQL Server. For example:
<add name="legacydb" connectionString="user id=sa;password=MtJcA76zIWmBCtNa1TI;Data Source=172.31.240.172;Database=Sitecore.Legacydb" />
Step 2: Create a Sitecore database configuration patch file
Create a folder named Include under the same App_Config directory. Inside it, add a new patch configuration file e.g., legacydb.config with the following configuration:
<configuration xmlns:patch="http://www.sitecore.net/xmlconfig/">
  <sitecore>
    <databases>
      <database patch:after="database[@id='master']" id="legacydb" singleInstance="true" type="Sitecore.Data.DefaultDatabase, Sitecore.Kernel">
        <param desc="name">$(id)</param>
        <icon>Images/database_master.png</icon>
        <dataProviders hint="list:AddDataProvider">
          <dataProvider ref="dataProviders/main" param1="$(id)">
            <prefetch hint="raw:AddPrefetch">
              <sc.include file="/App_Config/Prefetch/Common.config" />
              <sc.include file="/App_Config/Prefetch/Master.config" />
            </prefetch>
          </dataProvider>
        </dataProviders>
        <securityEnabled>false</securityEnabled>
        <publishVirtualItems>false</publishVirtualItems>
        <cacheSizes hint="setting">
          <data>100MB</data>
          <items>50MB</items>
          <paths>2500KB</paths>
          <itempaths>50MB</itempaths>
          <standardValues>2500KB</standardValues>
        </cacheSizes>
        <BlobStorage hint="raw:AddBlobStorage">
          <providers default="classic">
            <provider name="classic" type="Sitecore.Data.Blobs.ClassicSqlBlobProvider, Sitecore.Kernel">
              <param desc="databaseName">$(id)</param>
            </provider>
          </providers>
        </BlobStorage>
      </database>
    </databases>
  </sitecore>
</configuration>
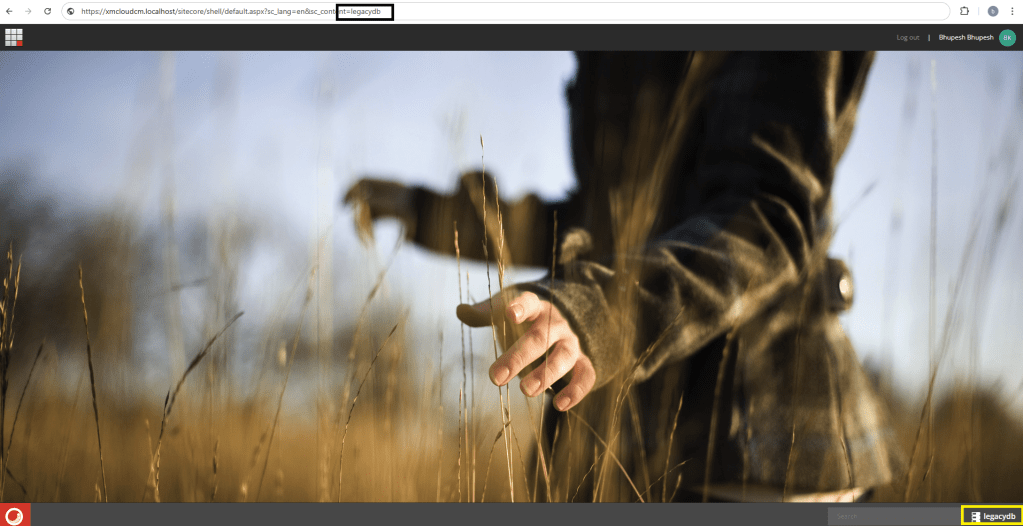
Once the patch file is in place, publish the changes through XM Cloud Visual Studio solution. Then, restart or refresh the local Sitecore instance. The new legacydb should now be available in the Sitecore databases dropdown.
Step 3: Migrate content using Sitecore CLI
To migrate content from legacydb into the XM Cloud master database:
1. Update module.json file to reference the legacy database as the source (this file is an example for moving one section of content):
{
  "$schema": "../../.sitecore/schemas/ModuleFile.schema.json",
  "namespace": "Common.Foundation",
  "items": {
    "path": "common-items",
    "includes": [
      {
        "name": "Base.Foundation.Templates",
        "path": "/sitecore/templates/Foundation/Base",
        "database":"legacydb",
        "allowedPushOperations": "CreateUpdateAndDelete"
      }
    ]
  }
}
2. Run the following command to pull content from the legacy database:
sitecore ser pull3. Remove the database property from the module or let it default to master, then run:
sitecore ser pushThis process allows us to extract content from the legacy Sitecore 9.1 database and push it directly into XM Cloud master database using the Sitecore CLI.
Conclusion
With this setup, we can easily access a legacy Sitecore database locally in XM Cloud environment and migrate selected content using Sitecore CLI.
I hope this helps anyone working through a similar upgrade or migration!
